Table of Contents
ToggleGood home theater lighting is invisible until it’s not. A poorly lit theater space kills the experience, glare washes out the screen, harsh shadows distract the eye, or dim corners make the room feel cramped. The right home theater lighting design, on the other hand, pulls the viewer deeper into the action. Whether you’re setting up a dedicated media room or carving out a corner in your living room, thoughtful lighting choices make the difference between a makeshift viewing setup and a space that feels professional and immersive. This guide walks you through the essential types of home theater lighting, practical installation strategies, and design considerations that’ll have your space ready for movie night in a weekend or two.
Key Takeaways
- Home theater lighting must control ambient light and glare while setting mood—poor lighting reduces contrast and creates viewer discomfort during extended viewing sessions.
- Dimmable ambient lighting using recessed cans (2700K–3000K warm white) installed 2–3 feet from the screen, combined with bias lighting behind the TV, creates both professional appearance and reduced eye strain.
- Task lighting solutions like wall-mounted sconces and LED strips add functionality and visual depth without overwhelming the screen or compromising picture quality.
- LED strip and bias lighting systems offer DIY-friendly installation with adhesive backing and low-voltage connections, eliminating electrical hazard risks compared to hardwired fixtures.
- Avoid common home theater lighting mistakes: never mount lights to shine directly at viewers, use quality dimmable LEDs rated for dimmer switches, and always test configurations before finalizing placement.
- Strategic dimmer control—whether wireless or hardwired—ties all layers together and enables preset scenes like ‘movie mode’ for a seamless, immersive viewing experience.
Why Lighting Matters in Home Theater
Lighting in a home theater serves two critical jobs: controlling how much light hits the screen and setting the mood without creating distractions. Unlike a bedroom or kitchen, where ambient light is practical, a theater space needs precise control to prevent reflections on the TV or projector screen. Even a small amount of ambient light scattered across a dark wall can reduce contrast and make black levels appear muddy.
Beyond image quality, lighting affects how long viewers can sit comfortably. Pitch-black rooms strain the eyes during credits or slower scenes, while abrupt changes from bright to dark cause pupil fatigue. Dimmable, layered lighting lets you dial in comfort throughout the movie. It also simplifies the setup afterward, no one wants to fumble in the dark hunting for the light switch. Strategic home theater lighting ideas like recessed lights in corners, LED bias lighting behind the screen, and wall-mounted accent fixtures solve both problems at once: they preserve picture quality and add practical functionality.
Essential Home Theater Lighting Types
Ambient and Accent Lighting
Ambient lighting sets the overall mood of the room. In a theater space, this typically means dimmable recessed lights installed in the ceiling or wall sconces placed low enough to avoid reflecting off the screen. Recessed can lights (recessed cans, typically 4 to 6 inches in diameter) work well because they’re flush with the ceiling and don’t protrude into the viewing zone. Install them at least 2 to 3 feet away from the screen to minimize glare.
Color temperature matters here. Most people prefer warm white lighting (2700K to 3000K Kelvin) in a theater, it’s easier on the eyes during dark scenes and creates an inviting pre-movie atmosphere. Avoid cool white (above 4000K) unless your space is very large and bright: it tends to feel clinical.
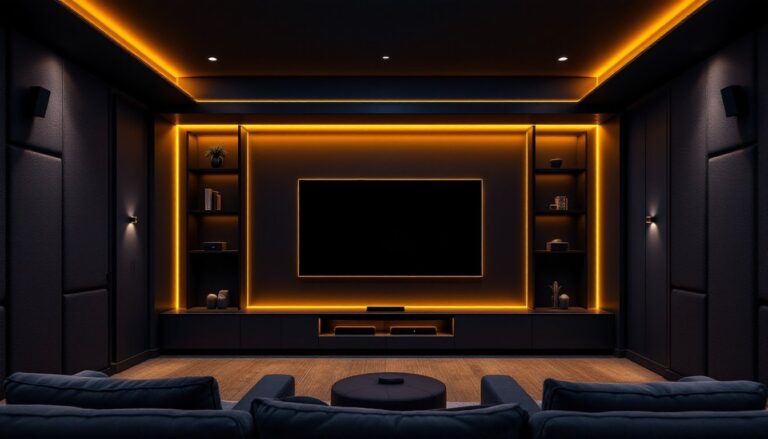
Accent lighting adds visual interest without overwhelming the screen. LED strip lights mounted along the back wall or behind wall-mounted shelves create depth and define the room’s boundaries. Bias lighting, light placed directly behind the screen or TV, actually improves picture perception by reducing eye strain and making the image appear to “pop.” Many modern bias light systems come with adhesive backing and plug into a standard outlet, so installation is straightforward.
Task Lighting for Functionality
Task lighting keeps the space functional. Wall-mounted reading lights or small LED fixtures near seating let you navigate safely without turning on bright overhead lights. These should be dimmable and positioned low enough that light doesn’t spill across the screen. Recessed lights with dimmer switches work, but dedicated small sconces or swing-arm wall lamps (typically 10 to 20 watts) give you finer control over where light lands.
Small LED fixtures designed specifically for home theater lighting offer flexibility, many can be color-adjusted, dimmed via remote, or even synced to music or on-screen action. Solutions like smart lights for home theater systems let you create preset scenes (“movie mode” kills most lights, “intermission” dims to a comfortable level). This approach takes planning, but it eliminates the need to adjust multiple switches mid-viewing.
DIY Installation Tips and Best Practices
Planning and Safety come first. Before drilling or running wiring, turn off power at the breaker and test circuits with a non-contact voltage tester (a few dollars at any hardware store). If you’re running new electrical circuits, check your local building code: most jurisdictions require permits for new outlets or light fixtures wired to the main panel. If you’re uncertain, hire a licensed electrician, mistakes here can cause fires. When in doubt, lean on a pro.
For recessed lights, start by measuring and marking ceiling locations. A standard 4-inch recessed can needs about a 5-inch hole in drywall: a 6-inch can needs about 7 inches. Use a drywall saw or hole saw (a rotary tool bit that cuts circles). Wear eye protection and a dust mask, drywall dust is fine and gets everywhere. Once holes are cut, secure the trim ring according to the fixture’s instructions (most twist-lock or use clips).
Wiring requires running 14-gauge or 12-gauge wire (depending on load) through the walls or ceiling. If your walls are already closed, consider surface-mounted conduit, which runs along walls and looks intentional if painted to match. Never skimp on wire gauge, undersized wire generates heat and risks fire. A dimmer switch for recessed lights must be a CFL/LED-rated dimmer: standard dimmers won’t work reliably with LEDs and can cause flickering.
LED strip lighting is far simpler. Most modern strips have adhesive backing and connect to a small power supply. Measure the wall or surface where you’ll install them, clean the area with rubbing alcohol, and press the strip in place. Run the power cord to a nearby outlet, hide it behind baseboards or with conduit, and test before mounting permanently. These systems are low voltage (usually 12V), so there’s no shock risk, a huge advantage for DIYers.
Bias lighting behind your screen is even easier. Most systems come with 3M adhesive backing: peel, stick, and plug in. Position the light diffuser so it’s hidden behind the screen but bounces light onto the wall behind and around the TV. The goal is ambient glow, not a glowing rectangle you can see during dark scenes.
Dimmer control ties everything together. Install a wireless dimmer remote or a hardwired in-wall dimmer switch connected to dimmable LED bulbs and fixtures. Wireless dimmers avoid the need to run extra wiring, but battery life varies. Hardwired dimmers are more reliable long-term but require running additional wires during install. Most DIYers find wireless easier for retrofits. Guides like the ultimate home theater lighting setup offer installation walkthroughs that clarify dimmer options and placement.
Avoiding Common Mistakes: Don’t mount lights so they shine directly at viewers, position them to wash walls or bounce off surfaces instead. Skip cheap LED bulbs: they often flicker with dimmers and have poor color rendering. Accept that dark rooms still need some low-level light: completely black spaces feel oppressive and hide potential safety hazards. Finally, test your setup before you finalize anything. Adjust fixture angles, swap color temperatures, and live with the lighting for a few days before fully committing to placement.
Conclusion
Home theater lighting doesn’t have to be complicated. Start with dimmable ambient lights and add accent or task lighting as needed. Research options like the best home theater lighting for 2024 before buying, prioritize safety and proper wiring, and test everything before finalizing. A well-lit theater room delivers comfort, functionality, and an immersive viewing experience, the payoff is well worth the weekend of work.